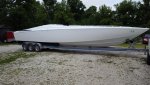
Now it's starting to look like a normal boat! Everything crammed together. Aka 15 pounds of shit in a 5 lb bag... Lol...
Twins with Twins, Anyone?
- Thread starter kidturbo
- Start date
You are using an out of date browser. It may not display this or other websites correctly.
You should upgrade or use an alternative browser.
You should upgrade or use an alternative browser.
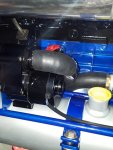
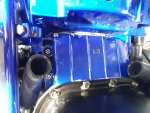
Yeah it's gett'n tight back there now. Still have to fit a pr of turbos, catch can, and related hoses.Now it's starting to look like a normal boat! Everything crammed together. Aka 15 pounds of shit in a 5 lb bag... Lol...
On the front end, a coolant reservoir of unknown capacity for starters.
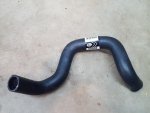
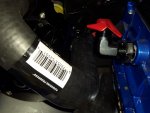
Sat around for couple hours looking through a Gates catalog for specific molded hoses to help finish up these cooling system. Then drive to the local parts store"s" to find they have zero of those part numbers in stock.. So that's when you ask to just pick some off the rack.
With some light modifications, about 60% success rate on my first try... :rofl:
With some light modifications, about 60% success rate on my first try... :rofl:
Attachments
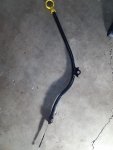
Oil level indicators also came in this week.
Was able to tweak the factory medium duty dipstick tube to fit nicely inside the header. But level indicator was way off for these modified deep sump pans and baffle plate setup.
Little searching led us to use 2.0L cavalier sticks, which are pretty freaking close to spot on. However now the GM specified oil viscosity listed on the stick is off.
Attachments

I'd look for either a generic aftermarket dip stick for the 2.0L and see if they omit the cost of stamping the viscosity, or get some stamps and just stamp "XXXXXXXXXXXX" over the incorrect viscosity.Oil level indicators also came in this week.
Was able to tweak the factory medium duty dipstick tube to fit nicely inside the header. But level indicator was way off for these modified deep sump pans and baffle plate setup.
Little searching led us to use 2.0L cavalier sticks, which are pretty freaking close to spot on. However now the GM specified oil viscosity listed on the stick is off.
Sent from my Cat S60 using Tapatalk
I'd be worried that polishing it out or welding over it and grinding it back would weaken the dipstick and have it break off eventually.
I've had that happen before. The GM 6.2L dipstick was notorious for breaking off and the tip falling into the pan. Seen it on a couple other vehicles I've worked on too.
Sent from my Cat S60 using Tapatalk
I've had that happen before. The GM 6.2L dipstick was notorious for breaking off and the tip falling into the pan. Seen it on a couple other vehicles I've worked on too.
Sent from my Cat S60 using Tapatalk
I'll just hit it with die grinder and buff that right off.. Think I'll leave the "See Owner Manual" >> :roflmao:
I have a friend that does laser engraving. Maybe I'll send em out to him update specification..
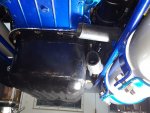
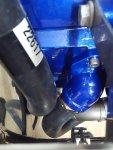
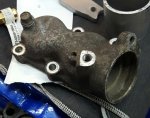
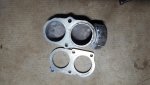
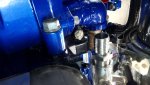
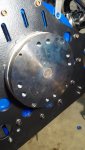
For a few weeks I've been trying to figure out a thermostat housing design that will allow clean mounting of a reservoir tank on front of the Banks intakes. I had some base plates cut out a while back. Issue is, one engine the cooler assembly is sets on left side, other engine it's on the right. Second issue is, I don't yet know how big the reservoir actually needs to be.
So I've been playing around with some tubing, trying to figure how to make a short 1-3/4" universal snout that to fits both engines. Then I set the OEM housing on top my 1/2" plate backwards, and said, "hey stupid cut two bolt tabs off corners and this fits like a charm." Weld these two pieces together and done.. Then I can mate the reservoir tank with o-ring flange to bolt right to it.. Duh...
Attachments

My machinist buddy and I tried our hand at heat treating the adapter shaft tonight. Wrapped shaft in stainless foil, heated to 1600 for an hour, and then quenched in water. All machined surfaces look to have maintained fit dimensions. So tomorrow we'll move to the tempering process. Then press it all together and real world test it..
Thanks 2004LB7 for all the advice. :thumb:
Thanks 2004LB7 for all the advice. :thumb:
Attachments
re: Tstat housing....sometimes the simplest solution is right there under your nose.
Nice to know it also happens to extremely intelligent/creative people such as yourself, and not just to goofball DIYers like me. :roflmao:
Nice to know it also happens to extremely intelligent/creative people such as yourself, and not just to goofball DIYers like me. :roflmao:
Ya every so often brilliance gets in the way of progress... But usually time constraints limits such issues.
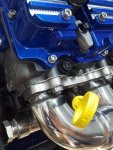
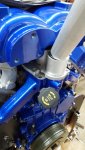
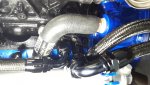
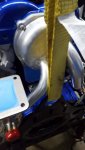
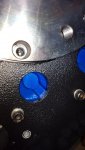
However my brilliant idea to block the original cross over passage in rear cover happened in the early stages of the engine build. Sounded good at the time. Now I have to deal with that decision while plumbing the electric circulation pumps.
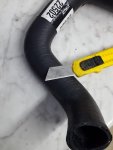
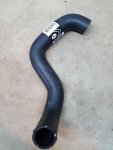
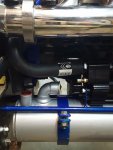
I did find that the same 1-1/4 U shaped Gates hose I used to come off the water pump and tuck under the engine, also fits on the other side of engine to wrap around the oil cooler delete / block adapter. Little 90 L tube and that brilliant idea in 2016 is corrected.. And one less hose # on the spare parts list...
And then there is that lifting hook hole in the rear cover.. LOL
However my brilliant idea to block the original cross over passage in rear cover happened in the early stages of the engine build. Sounded good at the time. Now I have to deal with that decision while plumbing the electric circulation pumps.
I did find that the same 1-1/4 U shaped Gates hose I used to come off the water pump and tuck under the engine, also fits on the other side of engine to wrap around the oil cooler delete / block adapter. Little 90 L tube and that brilliant idea in 2016 is corrected.. And one less hose # on the spare parts list...
And then there is that lifting hook hole in the rear cover.. LOL
Attachments
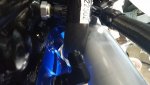
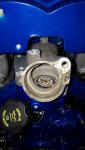
BTW anyone remember what the 2 different threads sizes are used in oil LML oil galley plugs are? The LML oil pressure sensor is conflicting with my coolant hose routing in pic above. So gotta plug that hole, and go back to LMM/LBZ sensors. Also need to stick a temp sensor in another.
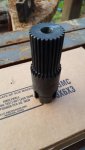
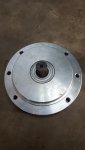
Dyno adapter assembly done !!
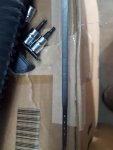
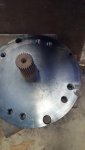
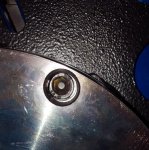
Tempered the spline shaft at 800F, then let it cool overnight. Which changed it from the nice pretty black to dull brown. Then we had to heat the end plate to press fit onto the shaft with only one key. Then drove second key into the slot to lock it in place. According to my blacksmith machinist, only way it's coming apart is in pieces.
Before pressing bearings into the hub, we cut a notch for access to press them back out when need replaced. Then we pressed the hub onto the shaft assembly. Nice tight fit, with about .200" clearance between hub and driveshaft faceplate.
I had planed to cut a snap ring grove into the shaft below the splines as a safety so it couldn't walk out. However the shop who cut the splines went a little deep and skewed our measurements. So I'll just tig a flat washer on there and call done. I don't expect to be taking it back apart anytime soon.
Attachments

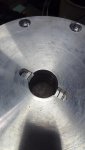
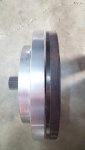
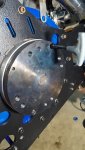
The shaft slides into the damper, and bolts thread into the rear cover, so it must be close..
Assembly takes a 1/4 turn of the engine to line up the access holes, but chit fits. Now I just need to find a dyno with that matching 8 bolt drive shaft flange pattern and we're set...
Assembly takes a 1/4 turn of the engine to line up the access holes, but chit fits. Now I just need to find a dyno with that matching 8 bolt drive shaft flange pattern and we're set...
Attachments
Last edited: