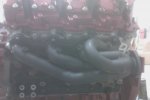
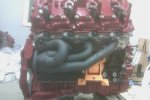
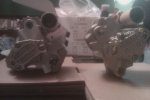
Beginning in August, I stared to build this truck with the intent of finishing by mid-October. I had a lot of work ahead of me and I still didn't have some key parts like the modded cp3 or the water pump or the plumbing. I had spent a solid year gathering parts while I was overseas, bored, anticipating coming home to build this truck. Tony Burkhard from Allseason Diesel Performance gave me a pretty good deal on the motor he ran in the Dirty Hooker last year, so I bought it as an assembled shortblock with Stage 2 Socal heads and told him I would be looking forward to making the drive out to his shop to meet him and pick it up when I got home. He sent Guy the bearings to have them inspected before reinstalling them into my motor and even after a full pulling season and a few thousand street miles, they looked "brand new"- to quote Guy. The heads were also sent to Guy to be checked - all checked out great. Tony had sent his injectors to have them flow matched and balanced after the 2009 season as well, and I couldn't be happier with a set that flows within 1% of each other at 160 mpa. The engine build consists of a LBZ block and crank, the crank was Mag'd and Polished and keyed, pinned stock oil pump, Carrillo rods, Mahle Forged pistons, ARP standard headstuds, mainstuds, and rocker shaft studs, Socal 8460 cam, Socal dampner, ATS flexplate, Socal chromoly pushrods, Socal Stage 2 heads, and 34 lpm LLY injectors. Now, you may wonder why I am bothering to do a LLY swap on an LB7, and my answer is just because it makes sense. It didn't cost me anymore really, it just meant more wiring.
Next, I called George Alexander for some parts for the trans. He sent up a kit and a 1055 converter. Every time I had a question he was eager to answer it, and even when I didn't, he wanted to make sure I was all set. I cant say enough about how great of a guy and a builder George is.
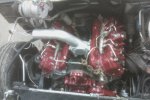
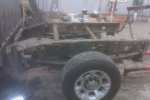
At this point, it was September, and school was starting up. I wasn't able to get into the shop much at all, but I kept going down and seeing this rusty frame and thinking to myself how stupid it would look to have a beautifully painted motor sitting on it. So I stripped the hydroformed front section first and used a zinc-phosphate primer to encapsulate the rust that was left, then put 2 coats of SEM Rust Shield chassis black on. For those of you who try this paint, make sure you apply it with a foam brush, not a bristle brush like I did. It needs to go on THICK. Also, make sure it is above 70 degrees for a few days for it to cure. It took 3 weeks for mine to cure because it was 40's at night and I couldn't leave it in the heated shop. I reassembled the front end and moved on to cleaning the engine covers and accessories at this point. It took me a couple days and several trials and errors to find out what worked best. I used Purple Power to wash everything down a few times. If at that point it wasn't clean, I used a cheap hand-held abrasive gun to blast it with glass bead. I sent everything to my buddy Zach at Full Tilt Auto Body and Custom Paint for a treatment of Dodge Inferno Red, a color I fell in love with after convincing another friend of mine to buy a 07 Cummins in that color.
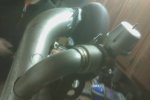
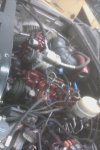
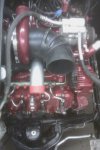
I wasn't able to start assembling everything until after final exams in December. But once we started, it went pretty smooth with the exception of the headers. The supplied bolts couldn't be used in 3 holes because of the way the piping got in the way, it was too close to the flange. So we went out and found some studs and notched the flange in one hole and made them work. We got the motor in the truck and started fabbing the intercooler piping and the downpipe and the plumbing for the 50mm gate that comes off of Rick's gated pedistal. Just as soon as we had that done, a "blizzard" came through and ripped the temporary garage I was storing the truck in when I wasn't working on it right off and tossed it through the field, scratching and denting both side of the truck in the process. I had to then put the rest of the body back together so that the insurance appraisal could be done, and I decided to send it to Zach's shop right away so that they could get started on it. I decided to have a little custom work done this time around, and I wanted to work with the "SS" theme, so they came up with a cool live flame scheme to shoot on and have the "SS" sprayed on after to give it a bit of a 3D effect.
As of today, the truck is still in the paint booth, lacking a tranny, plumbing, exhaust, and everything electrical. I still have to make the rear shock mounts and continue lowering both ends. I will continue to update the thread as it comes together and then throughout the summer as stuff breaks .
Here's a list of the key parts to the build:
Allseason shortblock
Big Dipper Trans Kit
Industrial Injection 150% over CP3
Engineered Diesel S476 Turbo
BD Intercooler
Stewart Water pump
LBZ van thermostat housing
modified LBZ intake y-bridge
Profab headers, uppipes, and pedistal.
MITUSA lift pump
Energy Suspension Poly Master Bushing kit
QA1 single adjustable front shocks
Super Diesel sleeves and cenerlink, gusseted Idler bracket, Cognito Braces
ISSPRO Performax guages in overhead mount and Data Logger
BT DieselWorks Allison Controls wired into Denali steering wheel controls
Merchant Automotive Poly Motor Mounts
MBRP 6" Stack modified for a 5" inlet and boxed for bed mount
Mike L-Spec'd Setrab Fuel Cooler with dual fans.
SikDmax Fuel Sump
Socal/Mike L trans dipstick relocation kit.
Dual Taurus fans controlled with Dakota Digital dual fan controller
AUX oil cooler kit - spec'd by Killerbee - bought used for cheap
6" aluminum intake - parts form intakehoses.com and custom ordered bends
most piping and flanges from mandrelbends.com and racepartsolutions.com
custom fuel, oil, transmission lines from Barry @ customracinghose.com
Relocated ECM, TCM, and FICM by myself and Ben @ BT Dieselworks
BlueSea Marine Fuse panel for all aux wiring
Some people that have helped me tremendously:
Ben Tyler - BT Dieselworks
Kyle - "dmaxfireman"
Henry Webb - Creatures of the Night Performance
Tony Burkhard - Allseason Diesel Performance
James - "xcablb7"
Dylan - "slipclutchms"
George Alexander - Big Dipper
Mike L. - Inglewood Transmission
Zach - Full Tilt Auto Body and Custom Paint
Chris Balise - "Leadfoot"


