LBZ: Anyone Done White LED Dash Lights?

duratothemax

<--- slippery roads
Aug 28, 2006
7,139
10
0
Wyoming
So did you have to put resistors in when you installed those angel eye leds?

No, they have the resistors already on the board.

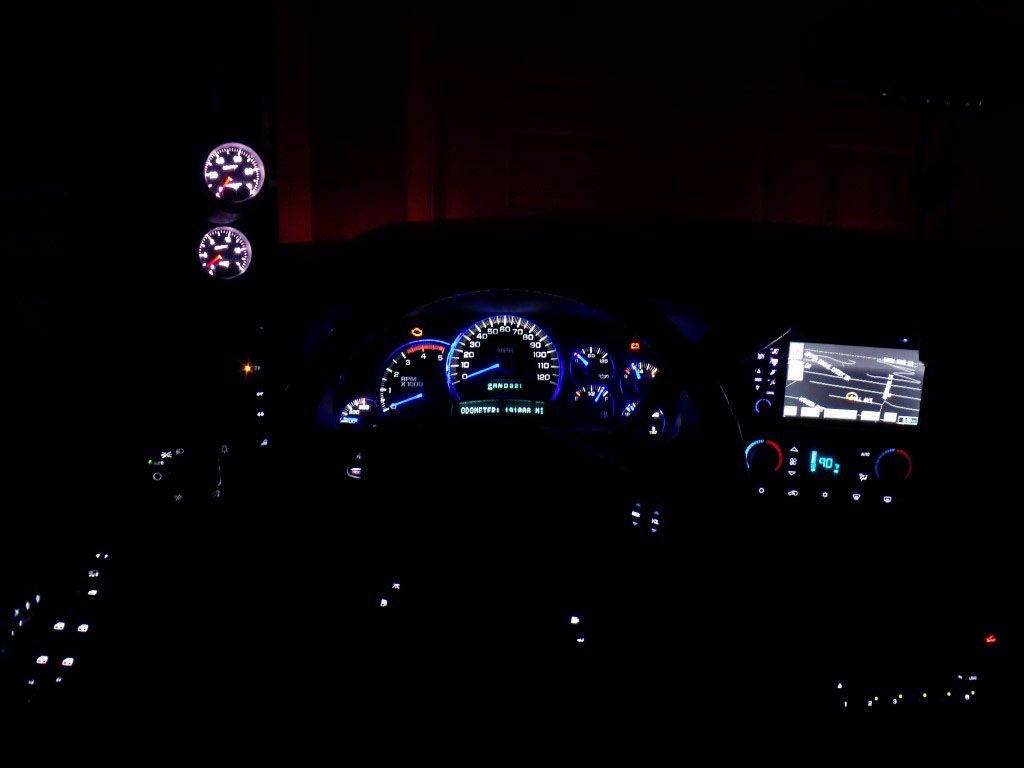
Since they are circular, you have to cut out a little section so its only a 270* ring or so.

I dont remember what sizes I used. I think I used a 90mm ring for the speedo and 60mm ring for the tach, and then I cut up little pieces to use behind all the other gauges.

And then you just hot glue the rings down right onto the cluster circuit board. It helps if you have a bench power supply so you can power up the cluster on the bench rather than having to run to and from the truck to mess around with the alignment, etc.

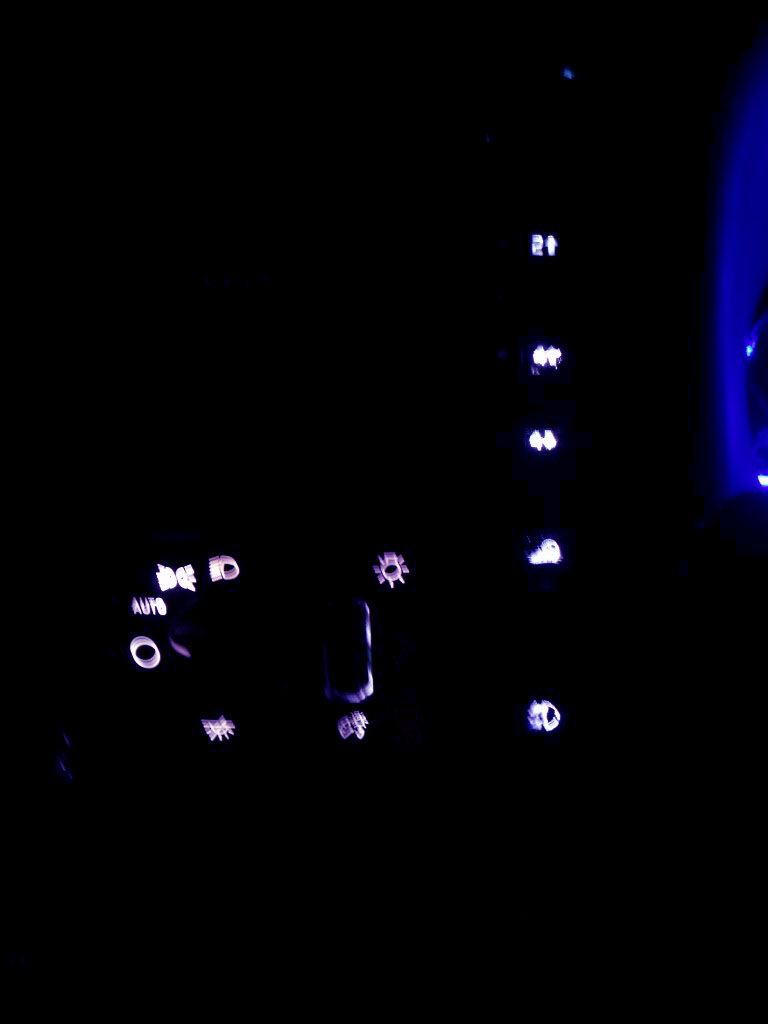
Also, you can carefully black out the km/h markings. It makes it look a little cleaner.

And the final trick is to use window tint over the whole overlay.

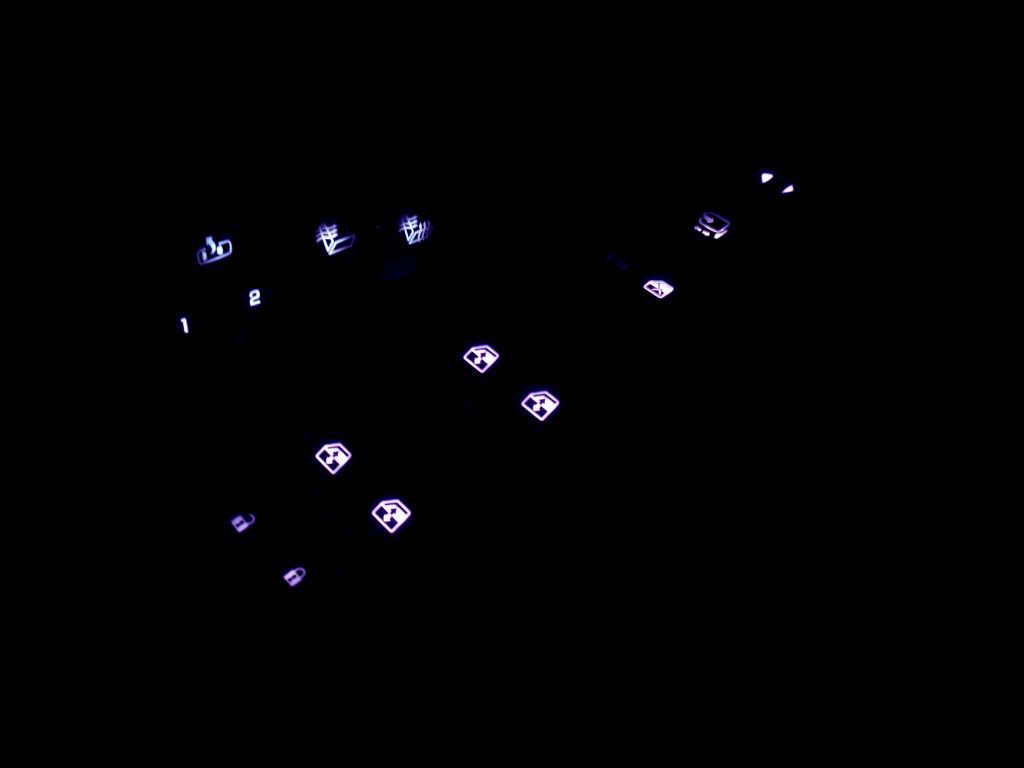
Thats what gives it the "glossy" look, and makes it look completely black (no numbers visible, all you can see are the needles just sitting there in a sea of gloss black) when the truck is off.... ;)

ben
 

Combine Pilot

They Call Me Mike
Feb 7, 2010
647
0
16
44
Saskatchewan
I'd be lost without the km/h markings but maybe i'll get rid of those damn MPH markings. :D Can you still dim the dash lights with these in there? I have heard some guys say they can't dim there dash lights after installing LEDs.
 

duratothemax

<--- slippery roads
Aug 28, 2006
7,139
10
0
Wyoming
ahh oops, didnt see you're in canada. :D

Yeah, you can get rid of the mph markings.

Mine dim just fine. Because I have the black tint on my overlay, I have to have the backlighting "on" even in the daytime, otherwise I wouldnt be able to see the numbers.

So I made a little "smart" box that monitors when the headlights are on/off. When the headlights are off, the backlighting on the cluster defaults to max brightness so I can see the numbers during the day. Its super visible, Its way easier to read in the sunlight than the stock cluster. And then when the headlights turn on, the cluster switches over from maximum brightness to "less bright" and in addition, also gets hooked into the dimmer switch, so I can dim it further, just like factory.

So, during the day, the dimmer switch has no effect (because the headlights are off obviously). It just goes full bright. Then at night, the dimmer switch comes into effect and controls brightness just like factory. But like I said, at night when the dimmer switch is on "full bright", its still not as bright as "daytime" mode....because if it was that bright, it would be obnoxious at night.

This isnt a good pic, but you can see how it looks "black" with the truck off.

DSCF6016_zpsa1164684.jpg
 

Combine Pilot

They Call Me Mike
Feb 7, 2010
647
0
16
44
Saskatchewan
Aaaaaah, the tint is on the overlay. I thought at first it was on the lens. I might have to buy a cheap dash from a wrecker to use while i redo mine cause it might take me a while but i think this has to be done now. Thanks Ben. :thumb:
 

duratothemax

<--- slippery roads
Aug 28, 2006
7,139
10
0
Wyoming
Again, the color rendering is off when I took the picture...

But the way mine are, is very "cool white" with a hint of purple.

DSCF60412_zpsdf0f2a5a.jpg


headlight switch, 4x4 switch, and fog light switch all matching in cool-white/purpleish. Also notice how the icons for the dimmer switch are illuminated. From the factory, only the Off, auto, park, on icons are illuminated. ;)

DSCF60512_zps8b115231.jpg


DSCF60622_zps6ba4e394.jpg
 

duratothemax

<--- slippery roads
Aug 28, 2006
7,139
10
0
Wyoming
To make the 4x4 buttons and fog light buttons look proper/white, you have to use some acetone on a q-tip, and VERY CAREFULLY dab at the back of the 4x4 buttons. If you do this, it will take off the blue tint from the back of the buttons and allow the white light to show through. Dont go too much though, because it will take off the black silk screen too. You can kinda see how some of the icons are a little blurry/fuzzy...its because I went a little too far. It looks really noticeable in the picture, but in real life its not really noticeable unless you look closely.
 

duratothemax

<--- slippery roads
Aug 28, 2006
7,139
10
0
Wyoming
Aaaaaah, the tint is on the overlay. I thought at first it was on the lens. I might have to buy a cheap dash from a wrecker to use while i redo mine cause it might take me a while but i think this has to be done now. Thanks Ben. :thumb:

yeah thats what I did when I was playing around with various designs/techniques. I bought a instrument cluster from a gasser that had a bad stepper motor for $40, and then experimented on that.
 

duratothemax

<--- slippery roads
Aug 28, 2006
7,139
10
0
Wyoming
Aaaaaah, the tint is on the overlay. I thought at first it was on the lens. I might have to buy a cheap dash from a wrecker to use while i redo mine cause it might take me a while but i think this has to be done now. Thanks Ben. :thumb:

I first put the tint on the lens, but then realized you couldnt see the nice Escalade chrome trim bezels around the gauges, and I think it looks nicer when you can see the needles "above" the tint as well.

So basically when the truck is off, you just see the needles there, and the chrome trim rings around the gauges.

I sprayed the overlay with 3M spray adhesive, and then put the tint on over that. I didnt use enough spray adhesive though, because the tint kinda lifted in a couple areas and if the light hits it just right, you can see some wrinkles in the tint. It looks kinda crappy when you see the wrinkles, but its not quite bad enough for me to want to take it all apart again and reapply the tint. Maybe some day if Im really bored ill take it apart and redo it, but for now, I have much better things to do...
 

duratothemax

<--- slippery roads
Aug 28, 2006
7,139
10
0
Wyoming
how exactly did you blackout the km/h marks?

I just carefully colored them in with a fine-point sharpie. You have to color them in on both sides of the overlay, front and back.

I dont know whether it will be obvious without the window tint on the overlay though. With the window tint, you cant see any evidence of the km/h markings. But on a stock overlay, you might still be able to just barely see the outlines where you colored them in......
 

Combine Pilot

They Call Me Mike
Feb 7, 2010
647
0
16
44
Saskatchewan
So do you want to do it for me Ben? ;) JK Do you want the led rings to line up directly under the numbers on the overlay? Just wondering if that would cause hotspots.
 

duratothemax

<--- slippery roads
Aug 28, 2006
7,139
10
0
Wyoming
Honestly, you guys probably wouldnt want to pay what I would charge to make another cluster just like mine.

Its not complicated and technical, just kinda tedious and takes a little fussing around.

The best advice I can give is to make it so you can power up the cluster and backlighting on the bench. Because running to/from the truck 100 times to check the little adjustment you made will make you go insane.

I can sell you guys a little bench harness/adapter/connector so you can power up your cluster on the bench though. Any +12vdc power source will work, a cheap wall adapter, an old computer power supply, car battery, two 6v lantern batteries etc.

The only "slightly" difficult thing is, if you're going to do the tint, you need to wire in a double-throw "flip-flop" relay, so when the headlights are off, the backlighting gets straight +12v, so its maximum brightness so you can see the numbers through the tint in the daylight....and then when you turn the headlights on, it switches the LED's over to the instrument panel lights dimming circuit.
 

duratothemax

<--- slippery roads
Aug 28, 2006
7,139
10
0
Wyoming
So do you want to do it for me Ben? ;) JK Do you want the led rings to line up directly under the numbers on the overlay? Just wondering if that would cause hotspots.

yeah, pretty much right under the numbers. The SMT LED's on the "angel eye" rings are wide angle, and theres a lot of them spaced close together, so you wont get any hot spots. Just hot glue them right to the instrument cluster PCB.

As I said before, you really should be fussing around with it on the bench with the cluster powered up, so you can set everything in place carefully, and then glue it when it looks perfect.