2015.5 Sierra SLT build

036.6turbo

Active member
Jan 17, 2014
747
92
28
Well, I figured I would post up what we have been up to. My son was ready to move from his CTS-V back to a truck.

He asked of there was room / time in my shop for a build, I was happy to get the chance to spend time helping him.

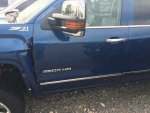
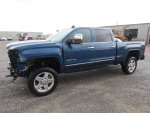
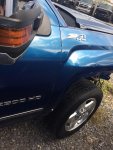
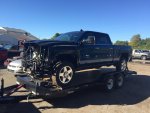
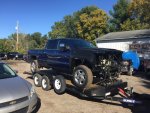
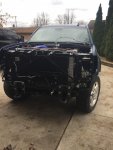
He bought this from 74Auto. Right front hit. Blew all the bags but the seats. 37k miles more options than my Denali (no Z71 on mine).

Plan is;
1. Obviously collision repair.
2. Sound deaden while the interior is out.
3. Full emission delete.
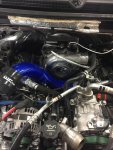
4. Wehrli cold air bundle.
5. Wehrli passenger side up pipe.
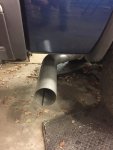
6. Wehrli down pipe.
7. Wehrli CP3 conversion.
8. FASS 165 lift pump.
9. GRP (I think) sump.
10. 4" Flo Pro exhaust.
11. CTS II monitor.
12. Danville tuning.

We haven't been religious about taking pictures, but I'll post up what I have.

It going to be a very nice truck when its done. My wife and I have been enjoying having him at the house so much. All around win.

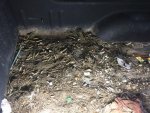
Pics of when he bought it.
 

Attachments

  • IMG_8251.JPG
    IMG_8251.JPG
    172.6 KB · Views: 126
  • IMG_8267.JPG
    IMG_8267.JPG
    135.6 KB · Views: 158
  • IMG_8249.JPG
    IMG_8249.JPG
    177.8 KB · Views: 124
Last edited:
036.6turbo

Active member
Jan 17, 2014
747
92
28
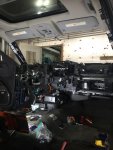
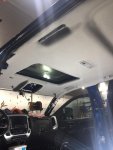
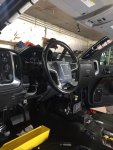
The first thing we did was to do the necessary repairs to the interior.

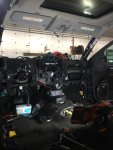
When the passenger side dash bag blew, it popped the windshield. That made it easier to get the headliner out.

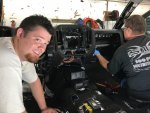
We completely removed the interior, cleaned everything, sound deadened everything, replaced all the blown bags had the headliner repaired, then put it all back together.

Surprisingly enough, the SDM did not need to be replaced, but both seat belt retractors were sent out for repair.

Always nice to see your kid smile.
 

Attachments

  • IMG_8307.jpg
    IMG_8307.jpg
    183.9 KB · Views: 117
  • IMG_8308.jpg
    IMG_8308.jpg
    194.2 KB · Views: 110
  • IMG_8309.jpg
    IMG_8309.jpg
    149.8 KB · Views: 100
  • IMG_8312.jpg
    IMG_8312.jpg
    194.3 KB · Views: 109
  • IMG_8310.jpg
    IMG_8310.jpg
    95.7 KB · Views: 121

036.6turbo

Active member
Jan 17, 2014
747
92
28
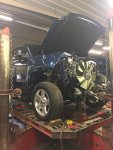
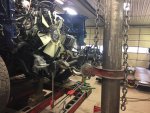
Once we got word our frame guy had an opening, we loaded it up and headed over to him.

We took him the new core support / both new fenders and the new hood.

He straightens out the frame horns, it did have some "sway" in the frame that he pulled out. Then he hangs the new metal to make sure all the gaps are correct and it all lines up.
 

Attachments

  • IMG_8467.jpg
    IMG_8467.jpg
    157.4 KB · Views: 96
  • IMG_8466.jpg
    IMG_8466.jpg
    140.6 KB · Views: 106
  • IMG_8338.jpg
    IMG_8338.jpg
    198.5 KB · Views: 105

036.6turbo

Active member
Jan 17, 2014
747
92
28
Four days and $480.00 later we picked it up and brought it back home.
 

Attachments

  • IMG_8339_tn.jpg
    IMG_8339_tn.jpg
    207.4 KB · Views: 93
  • IMG_8342_tn.jpg
    IMG_8342_tn.jpg
    195.8 KB · Views: 95
  • IMG_8343_tn.jpg
    IMG_8343_tn.jpg
    209.6 KB · Views: 100

036.6turbo

Active member
Jan 17, 2014
747
92
28
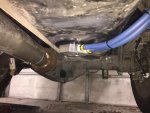
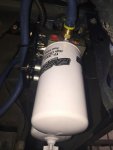
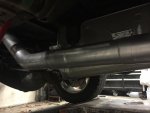
Once we got it back home we installed some of the parts that had arrived.
Fass
Sump
Flo pro
and the Wehrli stuff
 

Attachments

  • IMG_8382_tn.jpg
    IMG_8382_tn.jpg
    195.9 KB · Views: 80
  • IMG_8383_tn.jpg
    IMG_8383_tn.jpg
    110.5 KB · Views: 80
  • IMG_8385_tn.jpg
    IMG_8385_tn.jpg
    199.3 KB · Views: 79
  • IMG_8386_tn.jpg
    IMG_8386_tn.jpg
    119.4 KB · Views: 77
  • IMG_8387_tn.jpg
    IMG_8387_tn.jpg
    195.5 KB · Views: 79

036.6turbo

Active member
Jan 17, 2014
747
92
28
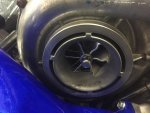
Some of you may recall my post complaining about the chipped wheel on the turbo. We pulled it off, he took it to Bullseye and had a Batmowheel installed.

after that was repaired we installed it. Then we did the CP3, "Y" bridge and the remaining Wfab stuff.
 

Attachments

  • IMG_8384_tn.jpg
    IMG_8384_tn.jpg
    204.1 KB · Views: 86
  • IMG_8390_tn.jpg
    IMG_8390_tn.jpg
    184.2 KB · Views: 86
  • IMG_8351.jpg
    IMG_8351.jpg
    80.9 KB · Views: 88

036.6turbo

Active member
Jan 17, 2014
747
92
28
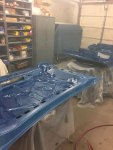
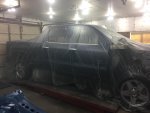
Now it's on to doing the body work.
 

Attachments

  • VOKV0222_tn.jpg
    VOKV0222_tn.jpg
    192.2 KB · Views: 81
  • DWEC0948_tn.jpg
    DWEC0948_tn.jpg
    144.3 KB · Views: 75
  • QLNJ6896_tn.jpg
    QLNJ6896_tn.jpg
    196.3 KB · Views: 75
  • 45878926_1888751594571377_2589497432718966784_n.jpg
    45878926_1888751594571377_2589497432718966784_n.jpg
    107.8 KB · Views: 74
Last edited:

Crulpeak

New member
Aug 21, 2018
9
0
1
Yeah, it has been a bit of a mad dash and pictures have slowly fallen to the wayside... here's a few more I have:

Pic 1: Pieces of the OEM intake found at the turbo inlet (likely part of what chipped the turbo wheel in/after the wreck)

Pic 2: Out with the old

Pic 3: In with the new

Pic 4: Wehrli part installed, before we got the fenders/etc in

Pic 5: Cab sound deadening
 

Attachments

  • sound deadened.jpg
    sound deadened.jpg
    156.5 KB · Views: 86
  • 20181028_181030.jpg
    20181028_181030.jpg
    200.7 KB · Views: 97
  • 20181020_105246.jpg
    20181020_105246.jpg
    166.1 KB · Views: 84
  • 20181020_105239.jpg
    20181020_105239.jpg
    156.4 KB · Views: 90
  • 20181014_171828.jpg
    20181014_171828.jpg
    123.2 KB · Views: 80
Last edited:

Crulpeak

New member
Aug 21, 2018
9
0
1
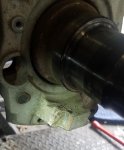
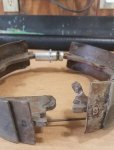
One fun tidbit we tracked down- picking the truck up from the frame shop, they informed us that the rear wheels were locking up at odd intervals, and only in reverse... we noticed the same while getting the truck into the garage, so we tore down the rear brakes to find that the driver's side parking brake took a serious impact and actually broke the parking brake/caliper anchor!

We found a relief in one shoe where the broken anchor bit was wedging itself between the shoe and rotor, jamming the wheel in reverse but falling out of the way in drive.
 

Attachments

  • 20181007_124835.jpg
    20181007_124835.jpg
    164.4 KB · Views: 76
  • 20181007_150716.jpg
    20181007_150716.jpg
    200 KB · Views: 75
  • 20181007_125025.jpg
    20181007_125025.jpg
    166.3 KB · Views: 76
  • 20181014_105501.jpg
    20181014_105501.jpg
    165.4 KB · Views: 70
Last edited:

Crulpeak

New member
Aug 21, 2018
9
0
1
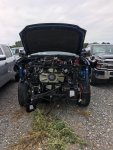
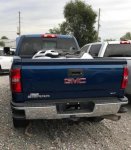
Few more pics, two at inspection before buying and the rest are once she was home and cleaned up a little bit- took a lot of time to sort thru the good parts, broken leftovers, garbage, dirt and even various shell casings! (9mm, .308, 12ga for the curious)
 

Attachments

  • inspection1.jpg
    inspection1.jpg
    86.1 KB · Views: 66
  • inspection3.jpg
    inspection3.jpg
    58.6 KB · Views: 62
  • cleaned up 1.jpg
    cleaned up 1.jpg
    192.6 KB · Views: 72
  • cleaned up 3.jpg
    cleaned up 3.jpg
    181.5 KB · Views: 79
  • bed cleanup.jpg
    bed cleanup.jpg
    167.9 KB · Views: 86

Crulpeak

New member
Aug 21, 2018
9
0
1
Very cool family project, I love that blue , will be a sharp truck when completed.


Its sure gonna be a nice truck when it's all said and done!

We are enjoying it for sure! Will be a suitable replacement for the Caddy when finished.:D All of my previous vehicles have been black, but when my wife and I saw this truck we knew it was the one- she fell in love with it in the salvage yard even! :woott:

Good work! Looking forward to seeing the finished product
Thanks, we are too- it has been a blast, but we are all ready to get her on the road and "complete" - although I can ever leave 'em be for very long:driving:
 

036.6turbo

Active member
Jan 17, 2014
747
92
28
even various shell casings! (9mm, .308, 12ga for the curious)

OMG the shell casing, we're still finding them, we found three or four when we pulled the bed off.

I hope the previous owner never gets pissed at us, that guy throws some serious lead around!
 

Crulpeak

New member
Aug 21, 2018
9
0
1
OMG the shell casing, we're still finding them, we found three or four when we pulled the bed off.

I hope the previous owner never gets pissed at us, that guy throws some serious lead around!


LOL that's the truth! Those steel-case 9mm worked their way into tons of little spots...


BTW I think your sig needs some updating :thumb:
 

Rivera.alan

New member
Jun 22, 2014
72
0
0
Orange County CA
Thanks, we are too- it has been a blast, but we are all ready to get her on the road and "complete" - although I can ever leave 'em be for very long:driving:


I think we all have that problem :roflmao:
 
Last edited by a moderator:

SmokeShow

Well-known member
Nov 30, 2006
6,818
34
48
43
Lawrenceburg, KY
Do y'all mind sharing the cost to undertake something like this? And I assume financing is not an option on a vehicle rebuild unlike a home where you can get "construction" loans that morph into mortgages?