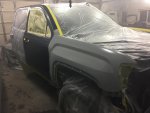
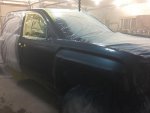
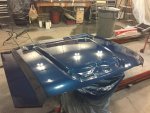
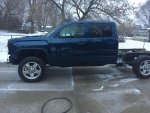
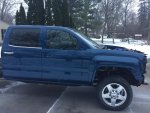
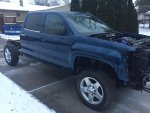
2015.5 Sierra SLT build

Crulpeak

New member
Aug 21, 2018
9
0
1
Do y'all mind sharing the cost to undertake something like this? And I assume financing is not an option on a vehicle rebuild unlike a home where you can get "construction" loans that morph into mortgages?

Seems like the willingness to finance salvage and/or rebuilt titles varies from bank to bank, but mine valued the truck at 50% of book value (in its totaled state) and purchase price was well below that.

Rebuild $$ can get tricky, I decided not to wrap those costs into the loan but I could have (up to that 50% value number)

I will be into this truck for ~$40k all told, from the WCFab parts & CP3 conversion to miscellaneous seals/gaskets to shipping/taxes on the truck & all parts.

Obviously I could have done this much more economically if I wanted to, but this will be a long term daily for me (as well as 5er hauler when the time comes) and I wanted to have zero doubts for years to come. Plus I didn't want to be tearing back into it any time soon :rolleyes:
 
Last edited:
Crulpeak

New member
Aug 21, 2018
9
0
1
Cool, thanks for sharing! Again, you're going to have a super nice truck when you and your dad are done!
Thanks, I (we) definitely enjoy the challenges in getting them back together.
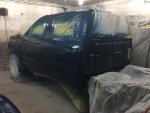
I work for GM and really get a kick out of people scrutinizing the rebuilds and comparing them to vehicles coming off the line, and I push myself to match that level of quality.

It's not for everyone, but this way I got the exact truck I wanted, plus all of the customization, in one shot. Considering what it would have cost me to build a similar clean title truck, and the time/mileage I will have this truck for, I'm happy with having gone this route.

Now, if I could just get my hands on the remaining parts I need! Mostly trim and small brackets/etc. Figuring out what you need BEFORE you need it is half the battle, lol.

Sent from my SM-G930V using Tapatalk
 

036.6turbo

Active member
Jan 17, 2014
747
92
28
Well, you are your father's son. ;) I really like that blue.

Haha!

Yes Tom, he's grown up in that shop, tearing stuff apart and putting it back together, he's cursed now to do it the rest of his life!! :roflmao::roflmao:

But yeah, I figured you'd like that blue, it is pretty. :beer2::beer2:
 

036.6turbo

Active member
Jan 17, 2014
747
92
28
Well, not much progress on the truck yesterday. It was an up and down day in the shop.

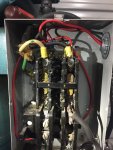
We had a problem with the air compressor that I thought was the motor starter. I ordered a replacement Monday, it arrived yesterday. Sadly that wasn't the problem. Upon further diagnosis, I discovered the capacitors have failed. Needless to say, I was less than excited about that revelation.

But the parts are on the way, hopefully Friday we'll be up and running again.

If you ever have a compressor issue, call these guys, they are awesome.
https://www.pacificaircompressors.com/
 

Attachments

  • OTJP8415.jpg
    OTJP8415.jpg
    187.1 KB · Views: 43
  • IMG_8455_tn.jpg
    IMG_8455_tn.jpg
    197.8 KB · Views: 44

036.6turbo

Active member
Jan 17, 2014
747
92
28
Now for the "up" part of the day.

My spray guns are getting pretty banged up and seem to malfunction at the most inopportune time during a job.

Being a hobbyist and not painting everyday, I've never felt justified to spend much cash on good equipment. But my lovely bride got tired of watching me redo something (and listening to me bitch about it).

She found a set of guns on FB Marketplace. The guy just came out of tech school, thought he wanted to be a painter, but changed career paths.

He had a full set of SATAJETs he had never even run air through. We worked out a deal, now I can't blame my screw ups on my guns anymore! LOL.

Sorry to bore you guys with non truck related content, but who else will understand the excitement of getting cool new tools for the shop?
 

Attachments

  • 46226881_2173311786036798_6016682611085148160_o.jpg
    46226881_2173311786036798_6016682611085148160_o.jpg
    98 KB · Views: 49
  • 46226890_2173312219370088_2351959821122535424_n.jpg
    46226890_2173312219370088_2351959821122535424_n.jpg
    64.6 KB · Views: 46
  • 46273721_2173313312703312_388250127136980992_n.jpg
    46273721_2173313312703312_388250127136980992_n.jpg
    66.4 KB · Views: 41
  • 46361197_2173312669370043_7577977023604195328_n.jpg
    46361197_2173312669370043_7577977023604195328_n.jpg
    68.5 KB · Views: 42
  • 46426329_2173311829370127_4808850228771815424_n.jpg
    46426329_2173311829370127_4808850228771815424_n.jpg
    60.8 KB · Views: 39
Last edited:
lutzjk913

Well-known member
May 5, 2010
1,689
182
63
groveport, ohio
New tools are always exciting man.

I keep several sets of tools and boxes available at the house. Just depends on the job that needs done.

How big is your guys shop?
 

036.6turbo

Active member
Jan 17, 2014
747
92
28
New tools are almost as exciting as new trucks for me. Love y’all work. Look forward to seeing it buttoned up and finished.
Thanks! We are too!
New tools are always exciting man.

I keep several sets of tools and boxes available at the house. Just depends on the job that needs done.

How big is your guys shop?

Not big enough, LOL.

26'x34' with a 8'x24' storage addition on the back.

Definitely not big enough, but we make it work. Takes planning and organization.

Like with this one, we completed the interior first, before doing anything else, so as to not have too many things sitting around cluttering up the shop.

Then it went out for frame work (timing on that was based on availability of our frame guy)

Once it was home, we pulled the front sheetmetal to color match the interior surfaces, but that allowed us to do all the motor work with the front clip off, made life much easier. The downside to that is no bodywork can be done while the motor is torn down, too much dust.

The other downside is we had to rehang all the front clip to have 12v power / flash the tune in the ECM / have the stack in place (for obvious reasons).

Now we are in the situation where the extreme lower portions of the "A" pillars need some bodywork attention, would have been nice to do those with the fenders off, but to complete test firing the motor, we needed the fenders on.

So it takes planning. We make it work.
 

bigmackmiller

Active member
Nov 30, 2008
1,046
2
38
Kokomo, IN
Def. get excited about new tools, especially when I got a good deal on some quality ones that will last a long time, and help to do a better job:thumb:
 

036.6turbo

Active member
Jan 17, 2014
747
92
28
Well, progress has slowed a bit, the air compressor for the shop has is having issues. What we thought was a failed motor starter, turned out to be bad capacitors. Parts were supposed to be here friday, still waiting on them.

First we just tried to use a small portable pancake compressor, just for short bursts of air, it failed to make any air after two days. So now we are limping along with my old gas powered 5 hp 20 gallon compressor.

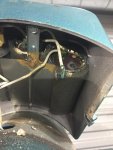
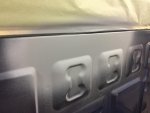
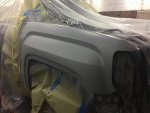
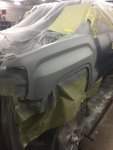
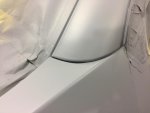
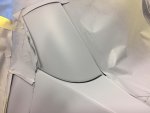
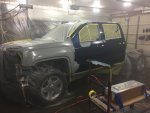
We were able to get all of the body work sealed up with epoxy, then get 2k primer over that. The OEM E coating got 2k as well. There really wasn't much body work, a few dents / dings. Leading edge of the driver's door needed a bit of attention. The bases of both "A" pillars were bumped back a touch. Other than that it's really straight.

Got to use one one the guns from the new set, very happy with it.

Couple of pics
 

Attachments

  • AWUL1198.jpg
    AWUL1198.jpg
    140.4 KB · Views: 62
  • DXYX3255.jpg
    DXYX3255.jpg
    116.7 KB · Views: 59
  • EBBK2619.jpg
    EBBK2619.jpg
    130.6 KB · Views: 60
  • LDZB0480.jpg
    LDZB0480.jpg
    132.3 KB · Views: 63
  • RIHB2687.jpg
    RIHB2687.jpg
    148.5 KB · Views: 60
  • CAUN2368.jpg
    CAUN2368.jpg
    91.2 KB · Views: 54
  • RGDD6224.jpg
    RGDD6224.jpg
    94.6 KB · Views: 54

036.6turbo

Active member
Jan 17, 2014
747
92
28
How did you pull the A pillars back into place?

Pick hammer. Knock the pucker back down out of it and the low comes back out far enough to use filler to finish it.

If it were knocked in very far I would have stud welded it and used a slide hammer to pull it.

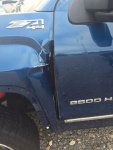
You can see from the before picture, it was just barely damaged. Just enough to require some attention. Just an odd area to work.
 

Attachments

  • IMG_8253.JPG
    IMG_8253.JPG
    159 KB · Views: 86

036.6turbo

Active member
Jan 17, 2014
747
92
28
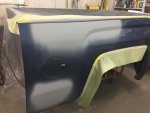
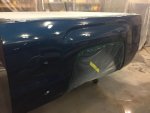
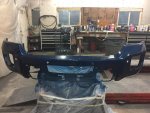
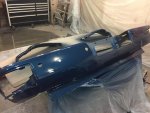
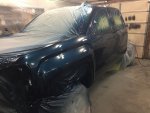
Well, we made some stuff blue over the holiday weekend.
 

Attachments

  • IIOL7688.jpg
    IIOL7688.jpg
    135.9 KB · Views: 55
  • IRCU4244.jpg
    IRCU4244.jpg
    196.4 KB · Views: 53
  • YKOY1143.jpg
    YKOY1143.jpg
    181.7 KB · Views: 51
  • CFNA8974.jpg
    CFNA8974.jpg
    176 KB · Views: 53
  • GJIB4154.jpg
    GJIB4154.jpg
    144.2 KB · Views: 55

036.6turbo

Active member
Jan 17, 2014
747
92
28
More paint pics. Hope to re assemble this weekend.
 

Attachments

  • IMG_8522.jpg
    IMG_8522.jpg
    148.4 KB · Views: 40
  • IMG_8524.jpg
    IMG_8524.jpg
    146 KB · Views: 42
  • IMG_8523.jpg
    IMG_8523.jpg
    147.8 KB · Views: 35

036.6turbo

Active member
Jan 17, 2014
747
92
28
After a few hours.
 

Attachments

  • GJRR6017.jpg
    GJRR6017.jpg
    126.8 KB · Views: 43
  • IMG_8529.jpg
    IMG_8529.jpg
    161.2 KB · Views: 42
  • IMG_8532.jpg
    IMG_8532.jpg
    160.5 KB · Views: 44
  • IMG_8530.jpg
    IMG_8530.jpg
    199.8 KB · Views: 45

036.6turbo

Active member
Jan 17, 2014
747
92
28
Outside
 

Attachments

  • IMG_8535.jpg
    IMG_8535.jpg
    203.7 KB · Views: 72
  • IMG_8536.jpg
    IMG_8536.jpg
    200.9 KB · Views: 72
  • IMG_8538.jpg
    IMG_8538.jpg
    196.4 KB · Views: 73