I wanted a few things from my lift pump install....
1. Easily reversible
2. Quiet
3. Long lasting
4. Good ground clearance
5. Increased filtration
and here's how I did it.
Starting at the rear, you have to disconnect the stock line. I stuck a small camera up above the tank and took a photo, so I could see what I was dealing with.
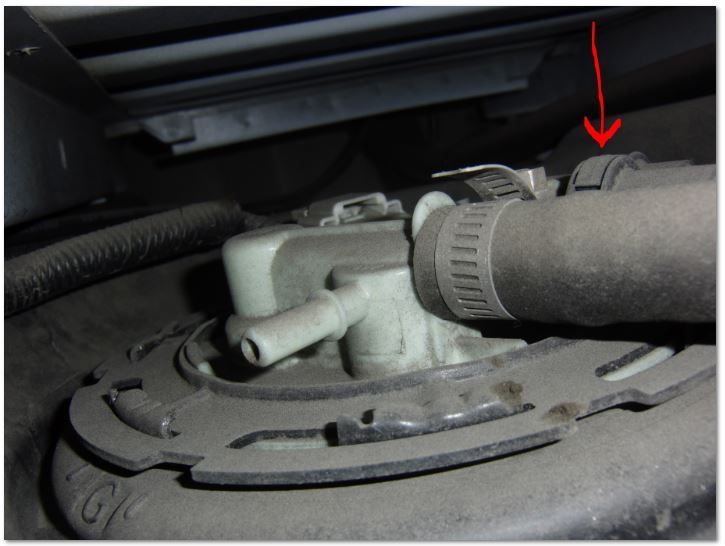
The middle line is the OEM suction hose, and if you push the button the arrow is pointing at, it pops right off. This is unique to the LML's. I wrapped the OEM fitting in a heavy Zip -lock bag and zip tied it for reuse , if I ever need to go back to stock. Kennedy gives you a hunk of hose to slide over the OEM fitting, and some clamps to secure it. I didn't like that, so I contacted Air-Dog, and bought their feed line, with the proper OEM style push on fitting. I am SO GLAD I did this. Its a one second install... push and "click"... done.
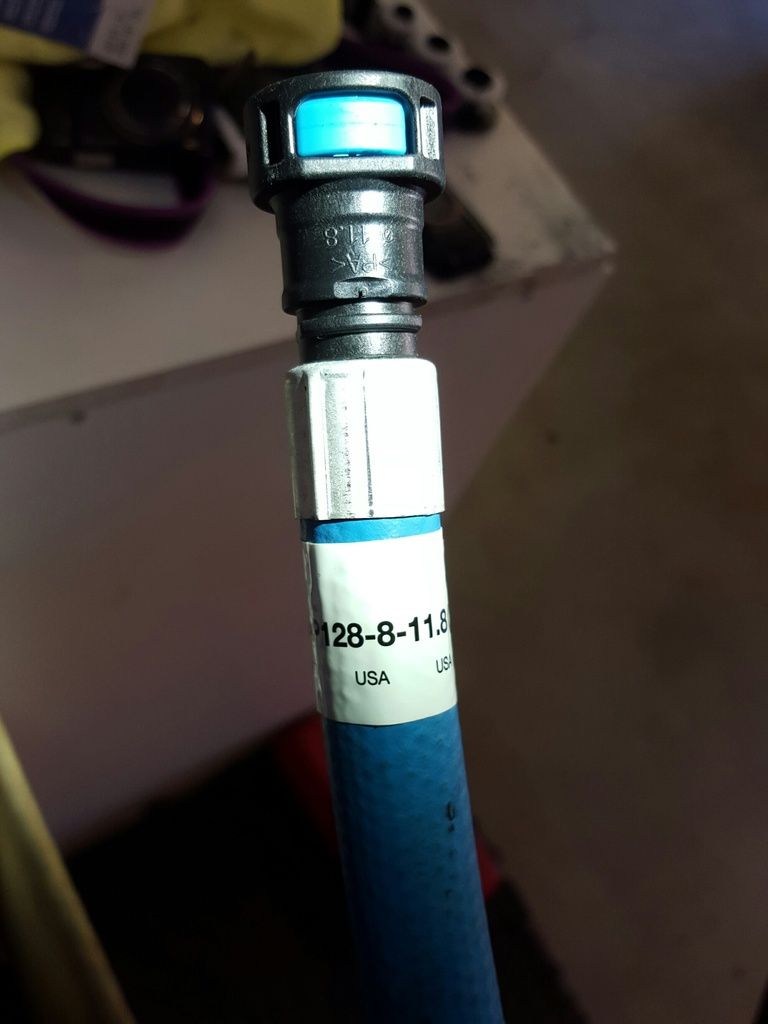
The hose clamps would have been a nightmare, and its shade tree engineering at best. This is the way to go. $25 well spent.
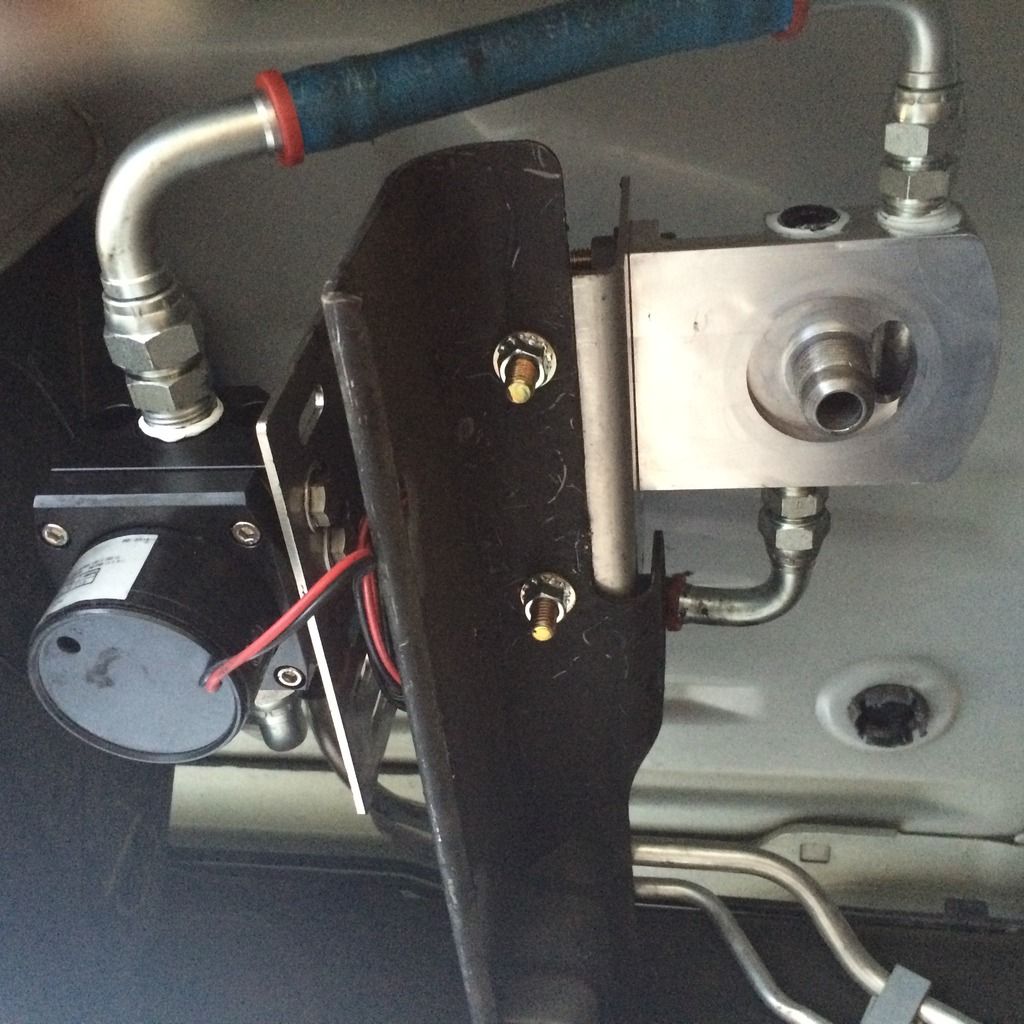
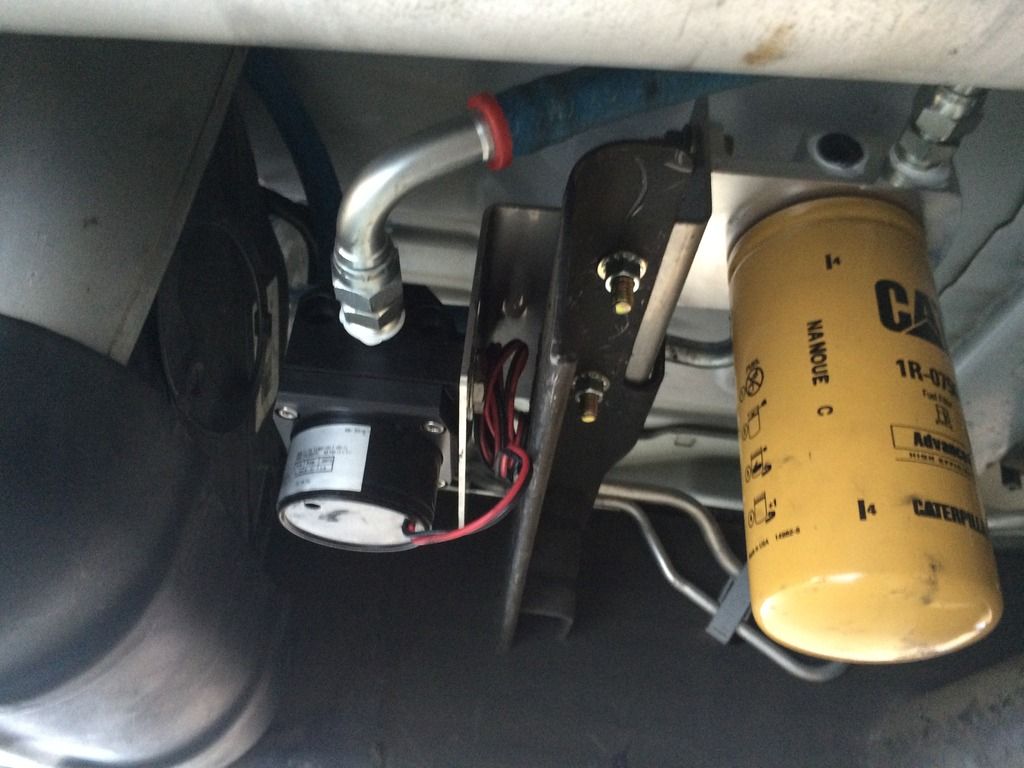
Next is the mounting. I used the "Z" bracket supplied by Kennedy, and hung the pump on one side, and the filter on the other. The pump mounts low for good gravity feed, and the filter mounts high for good ground clearance and alignment with the OEM hardline connection
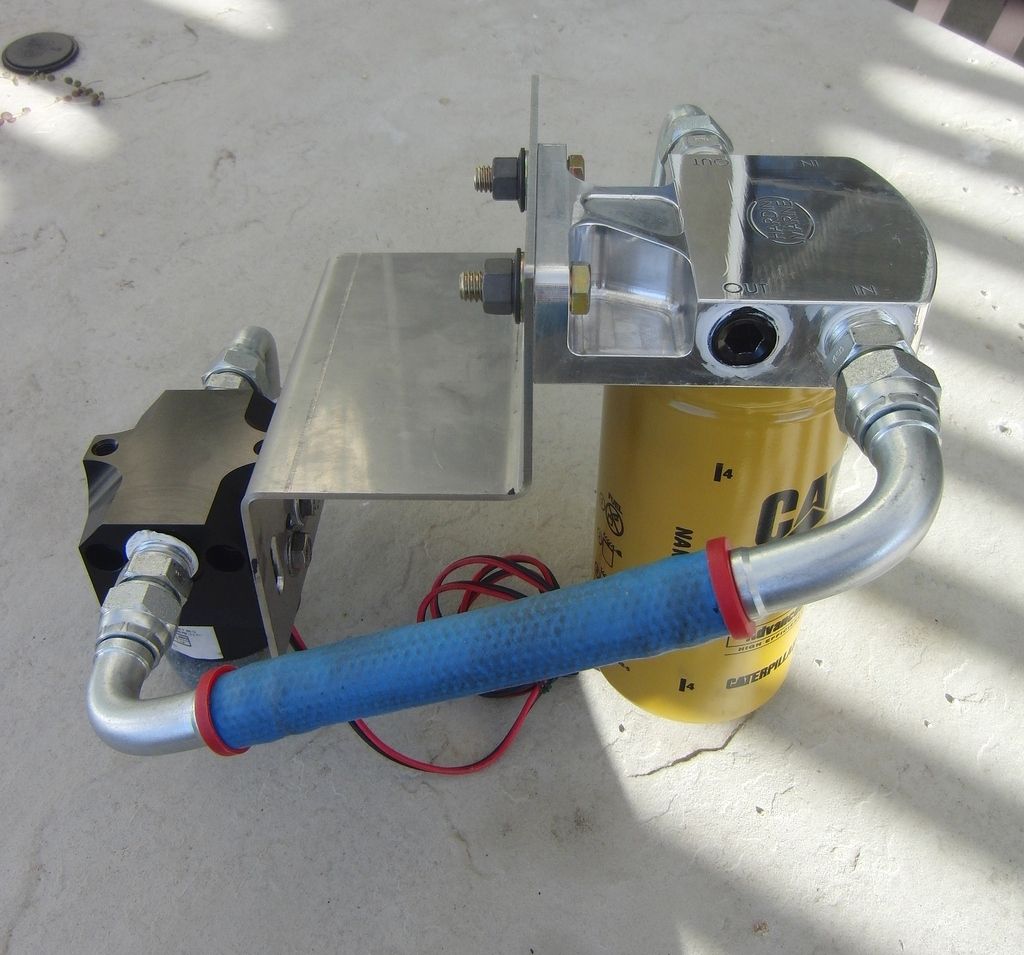
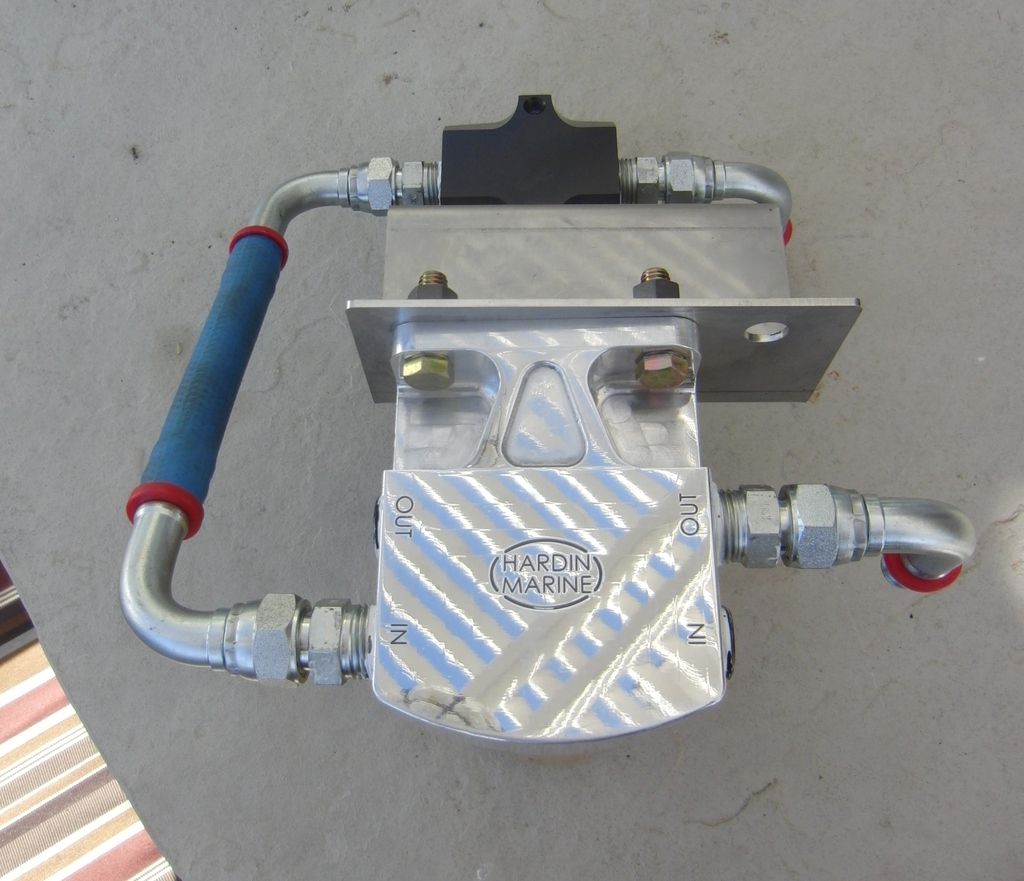
All fittings are from Vulcan Diesel, and are high flow, push on tubular radius's. The connections all went well, with short runs.
The "Z" bracket mounts to a unused stalk of the LML chassis. The bracket is stainless steel, and you better have some sharp drills ready, and drill the holes in a few steps. I did it this way so the entire assembly is mounted and removed as one piece, and the OEM hoses are left in place. To go back to stock, just remove the two bolts, remove the unit , remove the zip-lock bags, reconnect the OEM fittings, and you back to bone stock in about 5 minutes.
Here it is installed...
So, how does it work? Great! After bleeding everything out and connection the power, I get almost 4 psi with truck off. With the truck idling, its about 3 psi, and when power breaking it as hard as I can ( about 1500rpm, 15 psi boost) it will hold steady at 2.5 psi. Anything over 1 psi is the goal, providing positive head pressure, delivered at the inlet to the CP4. With only the OEM filter installed, I had 3" suction when idling. After installing the Cat filter and Kennedy pump, at idle with the power off, I have 6" of suction, so operation with the power off, or if the pump fails, should not be a problem.
This pump is so quiet, you have no idea if its working. If it lost power, of if the relay stuck in the closed position ( pump on), you would never know. I'm thinking of adding a tiny LED light somewhere in the cab to let me know when the pump is powered up, so I will know for sure.
...and there you have it. Pretty basic install, with great parts, in a tidy and easily reversible package. Hope it helps someone, and if you have any questions, please ask....
1. Easily reversible
2. Quiet
3. Long lasting
4. Good ground clearance
5. Increased filtration
and here's how I did it.
Starting at the rear, you have to disconnect the stock line. I stuck a small camera up above the tank and took a photo, so I could see what I was dealing with.

The middle line is the OEM suction hose, and if you push the button the arrow is pointing at, it pops right off. This is unique to the LML's. I wrapped the OEM fitting in a heavy Zip -lock bag and zip tied it for reuse , if I ever need to go back to stock. Kennedy gives you a hunk of hose to slide over the OEM fitting, and some clamps to secure it. I didn't like that, so I contacted Air-Dog, and bought their feed line, with the proper OEM style push on fitting. I am SO GLAD I did this. Its a one second install... push and "click"... done.

The hose clamps would have been a nightmare, and its shade tree engineering at best. This is the way to go. $25 well spent.
Next is the mounting. I used the "Z" bracket supplied by Kennedy, and hung the pump on one side, and the filter on the other. The pump mounts low for good gravity feed, and the filter mounts high for good ground clearance and alignment with the OEM hardline connection


All fittings are from Vulcan Diesel, and are high flow, push on tubular radius's. The connections all went well, with short runs.
The "Z" bracket mounts to a unused stalk of the LML chassis. The bracket is stainless steel, and you better have some sharp drills ready, and drill the holes in a few steps. I did it this way so the entire assembly is mounted and removed as one piece, and the OEM hoses are left in place. To go back to stock, just remove the two bolts, remove the unit , remove the zip-lock bags, reconnect the OEM fittings, and you back to bone stock in about 5 minutes.
Here it is installed...


So, how does it work? Great! After bleeding everything out and connection the power, I get almost 4 psi with truck off. With the truck idling, its about 3 psi, and when power breaking it as hard as I can ( about 1500rpm, 15 psi boost) it will hold steady at 2.5 psi. Anything over 1 psi is the goal, providing positive head pressure, delivered at the inlet to the CP4. With only the OEM filter installed, I had 3" suction when idling. After installing the Cat filter and Kennedy pump, at idle with the power off, I have 6" of suction, so operation with the power off, or if the pump fails, should not be a problem.
This pump is so quiet, you have no idea if its working. If it lost power, of if the relay stuck in the closed position ( pump on), you would never know. I'm thinking of adding a tiny LED light somewhere in the cab to let me know when the pump is powered up, so I will know for sure.
...and there you have it. Pretty basic install, with great parts, in a tidy and easily reversible package. Hope it helps someone, and if you have any questions, please ask....
Last edited:


